I was recently shopping at Marshall's, hoping against hope that I would find something that would make me look ravishing, world-wise, and capable of walking and chewing gum at the same time. Dare to dream. I did manage to find a pair of jeans that did not make me look ridiculous.
In the next aisle over was a young couple - she, looking through sweaters and he, dutifully tagging along. After a few minutes he said, "I thought you came here to buy shoes." I guess with communication would come understanding. Not all men understand the communication of what exactly is going to happen when some women go shopping for shoes. Not all women understand the understanding of some men when they hear a woman say that she's going shopping for shoes. Do you think that men and women should shop separate from each other?
I believe that it's important to know what we're communicating, and what the other person is hearing, when we use words. I also believe that it's important to be aware of what we're communicating with our facial expressions and postures. Once again I was at a training and had some professionals come up to me and state unequivocally that their residents will not do activities.
Flash back to an enlightening weekend spent learning about myself at an event known as Landmark Forum. When dealing with communication and behaviors, the participants at The Forum, were asked to consider the question, "Who am I being?" If a spouse or child is difficult to deal with we were urged to ask, "Who am I being that this person is behaving that way with me?" This was not done to assess blame, but rather to examine other ways of being with that person.
Bottom line, as anonymous said, "If you always do what you always did, you'll always get what you always got." Perhaps it's simply a matter of changing the way we do what we do. And then learning how to walk and chew gum.
Monday, October 31, 2011
Wednesday, October 19, 2011
Christmas Centerpiece - Part 1

At home, a few days before the session, I made up samples, using red, green, and gold acrylic paint, of what the paper could look like. I used simple stamping tools that included cardboard tubes from paper towels, corks, and strips of cardboard that were dipped into paint to make lines and dots. The samples looked like this.


 |
| Guess Who's The Class Clown |
Enjoy your holiday projects!
Thursday, October 13, 2011
Witches and Monsters and Fun, Oh My!
This week we did a quick and fun table decoration for Halloween. Next week we're going to start on a more complex Christmas centerpiece project for the tables, interspersing their creation with a Thanksgiving project. The holidays are upon us!

For our Halloween project we used mailing tubes for bodies, Styrofoam balls for the heads, a bit of paper for arms, and pipe cleaners for hands, hair on our monsters and witches, and the handles of the brooms. We also used pony beads on the faces for mouths or noses, depending on where they landed on the face, and some googly eyes. To attach the head to the body we used my favorite adhesive, gloss gel.
Supplies:
Styrofoam balls
Mailing tubes or Pringle cans or some such tub
Craft paint - purple, green and black
Googly eyes
Pipe cleaners
Pony beads, optional, you could paint on mouths and noses
Paper to create wrap around arms, broom bristles, and witch hats
Gloss gel
Pushpin for monster neck embellishment (every monster needs a bolt in his neck)
We began by painting the mailing tubes for the bodies, black for the witch and green for the monster. I painted the Styrofoam balls ahead of time at home because they took a bit of time to dry. I did the witch heads green and the monster heads purple.
Googly eyes were then attached to the heads with gloss gel and a pony bead pushed into the head for a mouth, or sometimes a nose. When the pony bead landed in nose position a mouth was painted onto the face with a small brush and some of the black paint used for the witch body.
To get matching paper for the arms I painted a brown paper bag on one side with the same paint used to paint the monster's body. Next the painted paper was cut into a two-inch wide strip. Gloss gel was spread onto the inside of the paper and a small loop of pipe cleaner set onto the end with an extra dab of gloss gel. Finally, the strip was folded shut and glued onto the body.
Witch hair was made by winding a bit of pipe cleaner around fingers or paint brush handles to create little springs that could be pushed into the side of the head below the hat. Monster hair was two short pieces of pipe cleaner stuck into the top of the head. Meanwhile, helper, Cathy, sat to the side constructing witch hats and brooms. Brooms were fringed paper wrapped around a pipe cleaner and glued in place with gloss gel. Hats were made by googling "making witches hats out of paper." The real directions used compasses and protractors. We used paper plates and jar lids to make our circles. Not as exact but fully functional.
To attach the heads to the mailing tubes a goodly amount of gloss gel was put onto the rim of the mailing tube and the head set in place. Next the head was lifted off of the mailing tube and the circle of glass gel imprinted onto the head marked the place where an additional amount of gloss gel was dabbed onto the head before it was once more placed onto the mailing tube to dry. Witch hats were then attached with gloss gel and the final monster touch of a pushpin into the neck completed the projects.
Nice to Know Notes:
Because our mailing tubes had a cover on the bottom we were able to insert a few stones into the tubes for weight. Although yarn would work equally well for hair and brooms we happen to have a considerable supply of pipe cleaners. And as Miss Piggy said, "You got to go with what you got!"

For our Halloween project we used mailing tubes for bodies, Styrofoam balls for the heads, a bit of paper for arms, and pipe cleaners for hands, hair on our monsters and witches, and the handles of the brooms. We also used pony beads on the faces for mouths or noses, depending on where they landed on the face, and some googly eyes. To attach the head to the body we used my favorite adhesive, gloss gel.
Supplies:
Styrofoam balls
Mailing tubes or Pringle cans or some such tub
Craft paint - purple, green and black
Googly eyes
Pipe cleaners
Pony beads, optional, you could paint on mouths and noses
Paper to create wrap around arms, broom bristles, and witch hats
Gloss gel
Pushpin for monster neck embellishment (every monster needs a bolt in his neck)
We began by painting the mailing tubes for the bodies, black for the witch and green for the monster. I painted the Styrofoam balls ahead of time at home because they took a bit of time to dry. I did the witch heads green and the monster heads purple.
Googly eyes were then attached to the heads with gloss gel and a pony bead pushed into the head for a mouth, or sometimes a nose. When the pony bead landed in nose position a mouth was painted onto the face with a small brush and some of the black paint used for the witch body.
To get matching paper for the arms I painted a brown paper bag on one side with the same paint used to paint the monster's body. Next the painted paper was cut into a two-inch wide strip. Gloss gel was spread onto the inside of the paper and a small loop of pipe cleaner set onto the end with an extra dab of gloss gel. Finally, the strip was folded shut and glued onto the body.
Witch hair was made by winding a bit of pipe cleaner around fingers or paint brush handles to create little springs that could be pushed into the side of the head below the hat. Monster hair was two short pieces of pipe cleaner stuck into the top of the head. Meanwhile, helper, Cathy, sat to the side constructing witch hats and brooms. Brooms were fringed paper wrapped around a pipe cleaner and glued in place with gloss gel. Hats were made by googling "making witches hats out of paper." The real directions used compasses and protractors. We used paper plates and jar lids to make our circles. Not as exact but fully functional.
To attach the heads to the mailing tubes a goodly amount of gloss gel was put onto the rim of the mailing tube and the head set in place. Next the head was lifted off of the mailing tube and the circle of glass gel imprinted onto the head marked the place where an additional amount of gloss gel was dabbed onto the head before it was once more placed onto the mailing tube to dry. Witch hats were then attached with gloss gel and the final monster touch of a pushpin into the neck completed the projects.
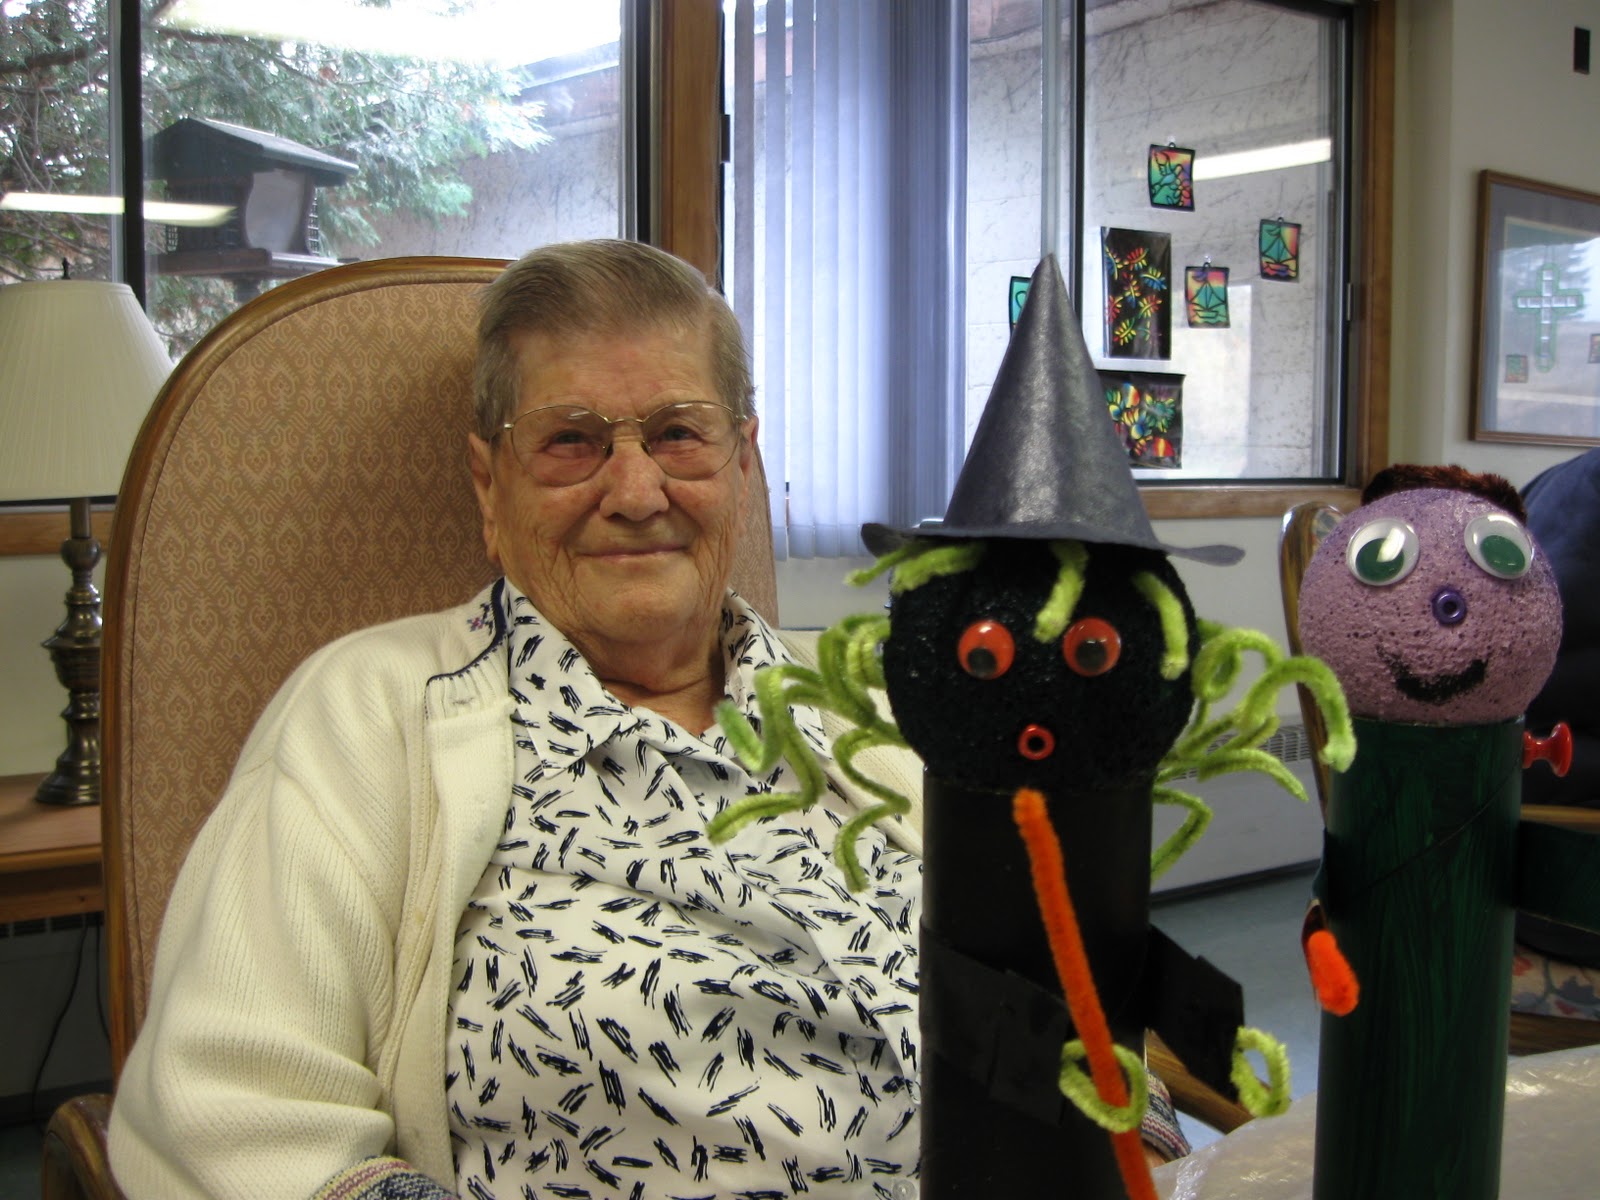 |
| Resting With Friends After a Job Well Done |
Nice to Know Notes:
Because our mailing tubes had a cover on the bottom we were able to insert a few stones into the tubes for weight. Although yarn would work equally well for hair and brooms we happen to have a considerable supply of pipe cleaners. And as Miss Piggy said, "You got to go with what you got!"
Subscribe to:
Comments (Atom)